Updating your MX-7GPS Firmware
DO NOT USE YOUR NAVIONICS CARD FOR THIS UPDATE
When a new firmware version becomes available, you can easily update your MX-7GPS by yourself. (Update will not work with Apple/Mac computers). The MX-7GPS is upgraded through the SD card slot.
System Requirements – PC only computer and micro SD card for your MX-7GPS.
- System will update from a micro SD card (class 10 or higher, 4 – 32gb card required.) DO NOT USE YOUR NAVIONICS CARD!
- Format your micro SD card (FAT32). WARNING – This will erase everything on your SD card!
- NOTE: PC’s without Micro SD card slots may require SD card readers/adapters.
Update procedures and your Digital firmware download are found below:
1.Click on the Firmware file attachment below.
- A pop-up window will appear on your screen below.
- Click on the down arrow next to the save button to display options.
- Choose “Save as”
- Save zip file to your Desktop.
- Go to your desktop and RIGHT click on the zip file.
- Choose “Extract All” (DO NOT change the file name/extension or try to open the file on your computer as it will corrupt the file and you will need to delete that copy and redownload the file again).
- NOTE: Only download the firmware file once, using any additional copy of the download will not work to update your MX-7GPS. i.e. mx7gps_v21.03.08.14.00.bin(1)
- NOTE: this is a large file upgrade and thus, takes several minutes to install. there may be several stages and points when the screen will go black. Do not power off the unit until the main dashboard/active screen reappears.
MX-7GPS FIRMWARE DOWNLOAD
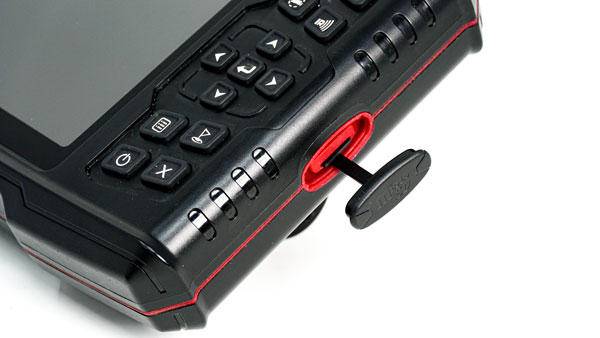
2. Open the rubber plug on the side of the display.(See figure #1 below)
Figure #1

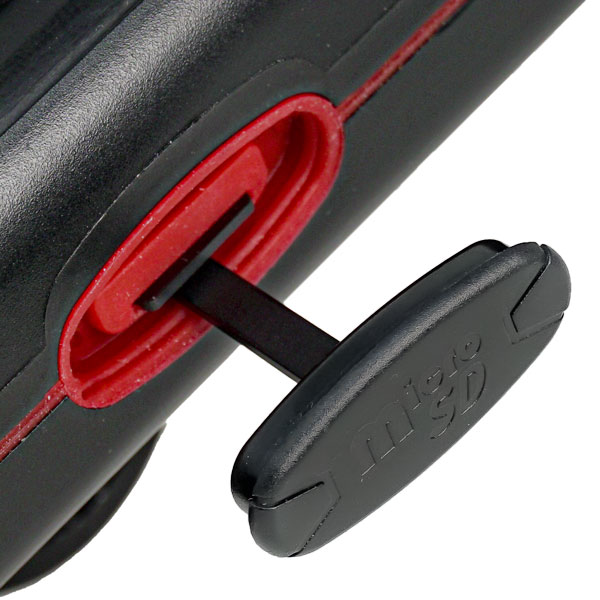
3. Remove Micro SD card from unit by gently pressing the top of the card to eject. (See figure #2)
Figure #2

4. Insert a Micro SD card into computer or card reader.
NOTE: DO NOT USE YOUR NAVIONICS CARD
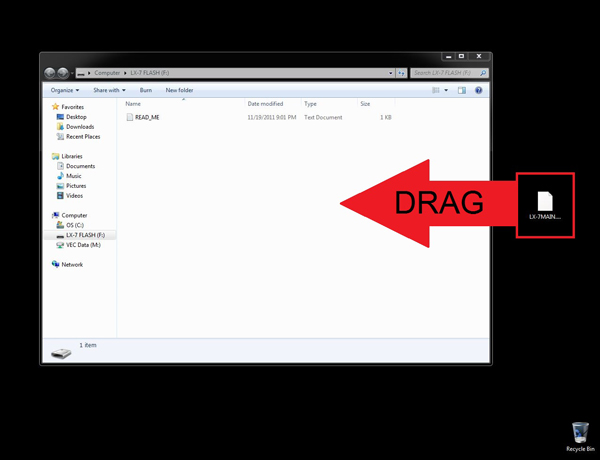
5. Drag upgrade file (mx7gps_v21.03.08.14.00.bin) onto the micro SD card (do not place it into the DCMI folder)(See figure #3).
Figure #3

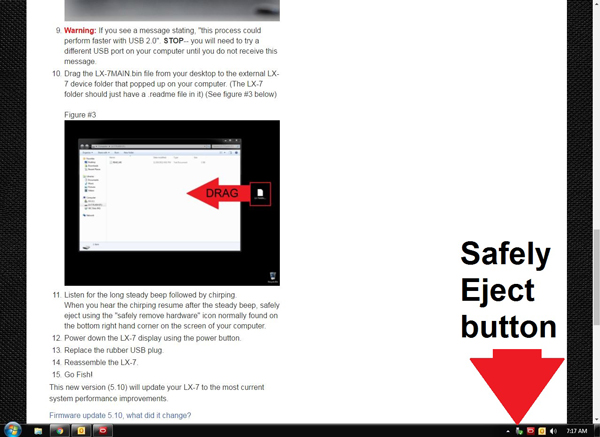
6. Safely eject using the “safely remove hardware” icon normally found on the bottom right hand corner of the screen on your computer. (See figure #4 below)
Figure #4

7. Insert the Micro SD card back into the MX-7GPS.
8. Turn the system on by pressing the power button.
9. You will see the MX-7GPS logo & then the update screen will appear.
10. Follow the on-screen instructions.
11. Gently remove the micro SD card form the MX-7GPS and re-insert your Navionics Chip.
12. Replace the micro SD plug.
13. Go Fish!
This new version (21.03.08.14.00) will update your MX-7GPS to the most current system performance improvements.
1. The unit will save the last settings on power down
2. Press and hold of the pages button will toggle to full screen GPS. Press and hold again it will bring you back to what you had on the screen prior.
3. Added the ability to save 4 different Layouts. This is in the Display tab. On the top you will see your Layout drop down.

